Posted by Caroline Williamson –
We fawned over the handmade furniture of California-based foureyes back in 2012 so much that we decided to revisit the company to get some insight as to how one of their pieces is made. Bad Larry is an angular, well trapezoidal, lust-worthy console fit for housing your electronics and TV or storing your dishes in the dining room. Whatever way you decide to use it, the piece’s handcrafted perfection will set your space apart. Let’s go inside to see how designer/owner C. Sevin Salomone makes this customizable piece in this month’s Deconstruction.
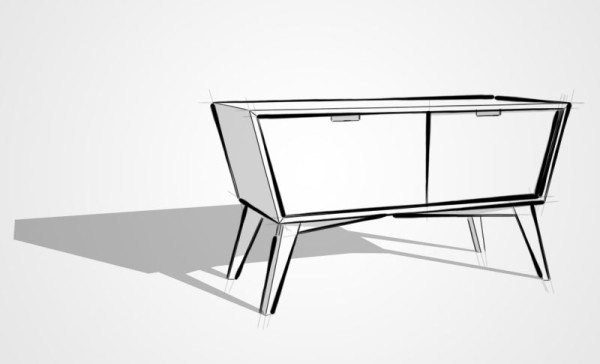
“Bad Larry” was conceived when a client, who liked the look of my other work, wondered if I would be able to build her a TV console. I had actually never built a console before, but had been wanting to…so this seemed like the perfect opportunity. She didn’t have a whole lot of direction so I said “give me a couple days to whip up some drawings, and we’ll take it from there”. This is the idea she liked the best, and so “Bad Larry” was born.
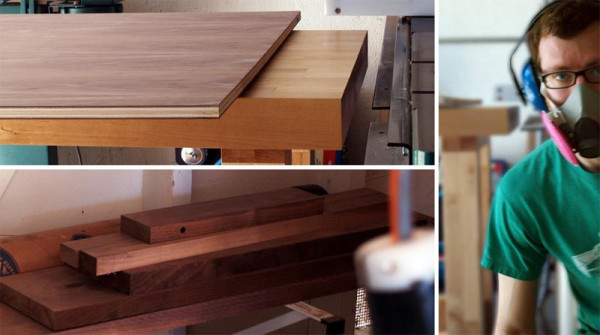
Per the client’s request, this Bad Larry is going to be made out of walnut (but other species are certainly possible). I’ll be making the case out of walnut plywood, which I’ll edge with some walnut hardwood (to cover up the plywood lines) and the base will be made entirely of hardwood. Oh yeah, and I always make sure to protect my ears, eyes and lungs…because I’m cool like that.
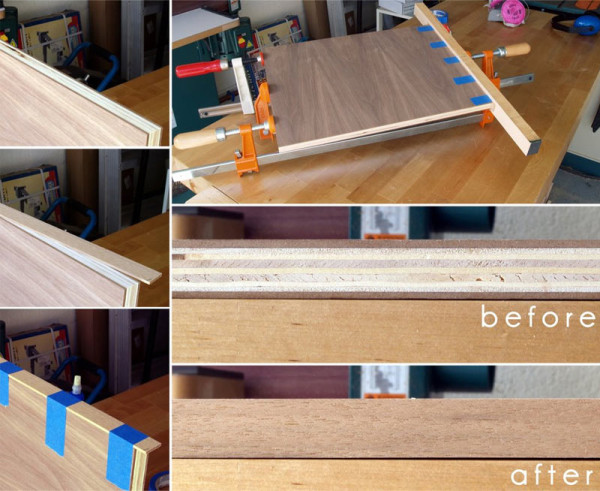
The Case
Once I’ve broken down all of the components so that they are just slightly oversized from what their finished dimensions will be, I attach hardwood edging. It’s pretty much a matter of cutting a few thin strips and gluing them to the plywood. After the glue dries and I clean things up a bit, you’d never even know that you’re even looking at plywood…well…except that I just told you, so never mind that. What I meant to say is that this piece is made of pure hardwood, especially the casework. I should be charging thousands more than I do ☺
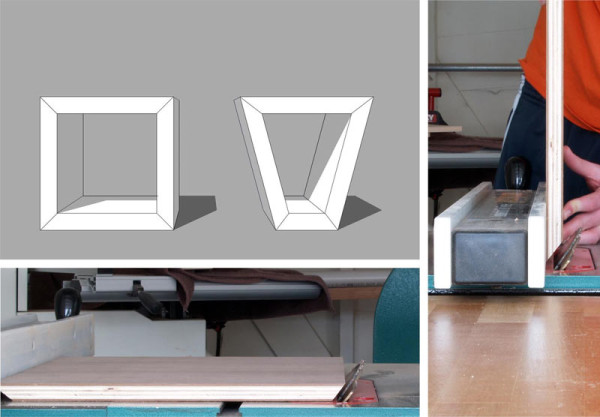
The first time I built a Bad Larry, this next step was the one that I was most intimidated by. It might not have been wise to build a trapezoidal (yup, that’s a word) case for my first attempt…but all’s well that ends well, right?
Please bear with me while I get a little “mathy” (that one’s not a word) for a second. If you picture a square case, all the angles are 90 degrees. If you’re mitering the corners, you cut two 45 degree angles, put them together, and Bob’s your uncle. For this case, the top angles are 75 degrees, and the bottom angles are 105 degrees. Basically off 15 degrees from 90 either way. Cool? Cool.
So, the answer is still pretty simple, you’ll cut miters of 37.5 degrees (75/2) and 52.5 degrees (105/2). Easy enough, EXCEPT! You can’t tilt a blade, at least not the one on my table saw, to anything greater than 45 degrees. The solution, run the piece you’re cutting vertically against your fence, instead of horizontally against your table. It might not make a ton of sense to you, but I promise if you were there you’d understand.
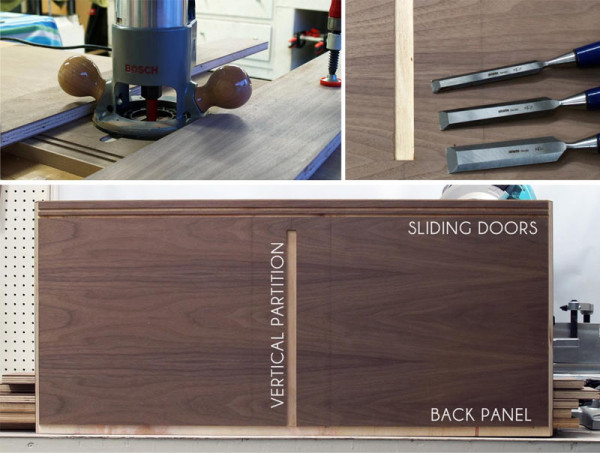
The last thing I’m doing here, which is something that any woodworker who is worth their weight in sawdust will tell you to do, is cutting in all of the dados and grooves I’ll need to accommodate my vertical partition, back panel, and sliding doors.
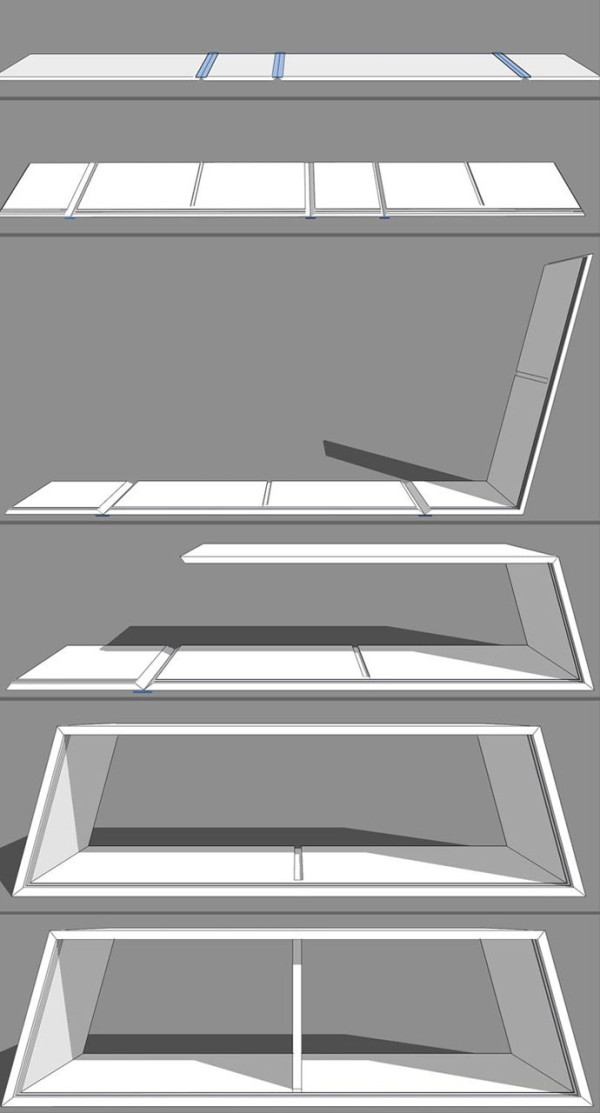
Being a “one man crew” has its advantages…but not when it comes to photographing things while glue is drying; hence, you’ll have to settle for a drawing. To assemble the case I use a technique I read about a few years ago. Essentially you take packaging tape and place it on the outside corners, lay everything end to end, spread your glue, and fold the whole thing together like a big ‘sofritas’ burrito from chipoodle.
In subsequent Bad Larries that I’ve built, I’ve taken extra measures to re-enforce this particular joint…but they might be overkill. The first Bad Larry I built used this technique and still remains intact.
The Base
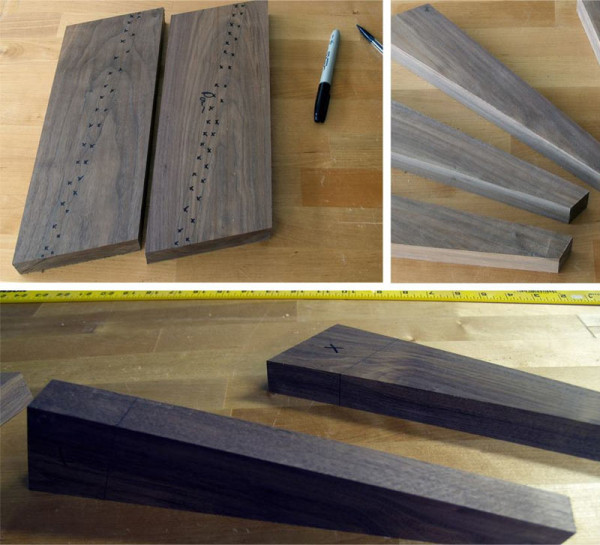
After I mill all the hardwood down the proper thickness, I rough out the basic shape of the legs and braces using my bandsaw. Next I do some fine tuning on one of the legs to get it just how I like it, and then use it as a template to produce the other 3 legs.
I’ll usually make a 5th leg as a spare. That way if I mess something up down the road, I have a perfectly sized part to use as a back-up.
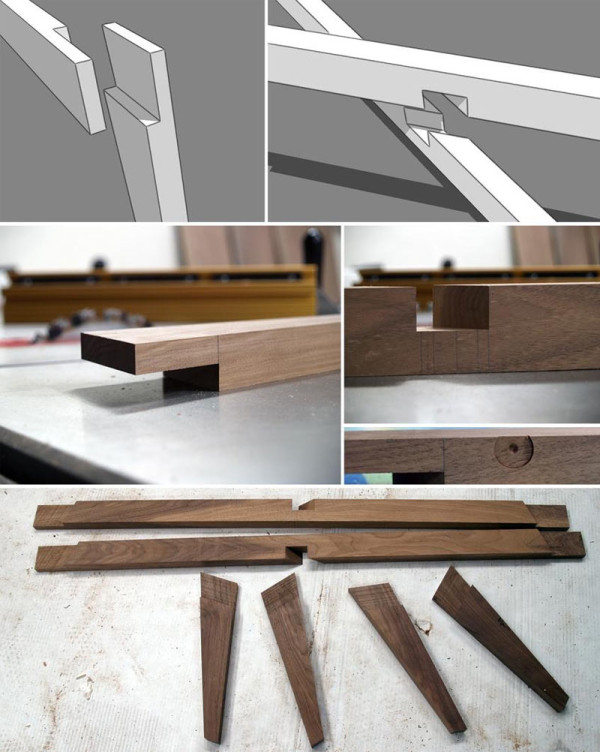
Next, I cut all of the joinery into the legs and braces. This is kind of a slow process, but it pays off to be extra careful to get everything just right. In my opinion, you end up saving yourself a lot of time down the road because you don’t have to do as much sanding…and it’s really what makes a piece look professional. Plus, fellow woodworkers love geeking out over nicely cut joinery.
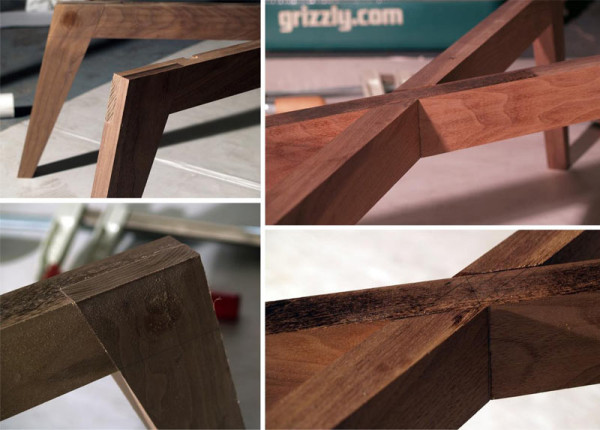
With all the joinery cut I glue and clamp everything together. After it’s all dry, I can clean everything up with my final sanding, make sure the base isn’t wobbly, and then breathe a sigh of relief. There are still plenty of hours ahead of me on the build, but there is something nice about knowing that the construction part is over, and all of your angles and calculations were correct.
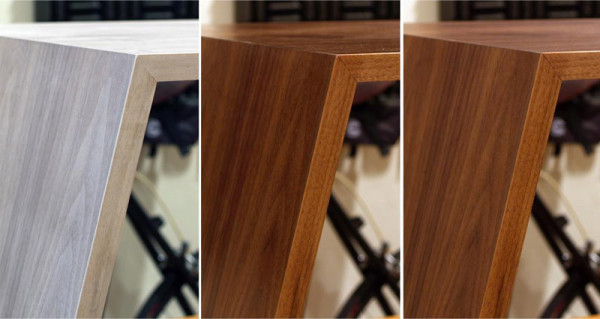
Here I am applying my finishing oils. I like a natural look, and walnut is a beautiful species, so I don’t typically use any stains. I know you’re probably thinking that the picture on the right looks much darker than it does on the left, but really, if you were to just put water on the piece, it would darken it up just the same. What can I say, I was born in the 80s…and I’m just naturally drawn to the “wet look”. That was a thing right?
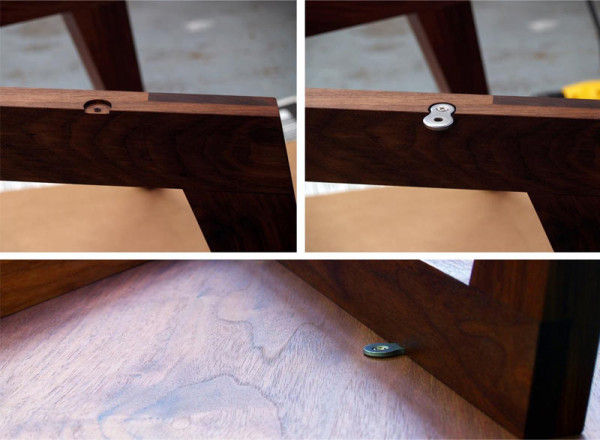
Several coats of oil and many days later, Bad Larry is all dry and ready to be assembled and shipped off (or picked up if you’re local ☺). I like to use these figure 8 clips to attach the top and the bottom. They allow for wood movement (no perverted jokes please), and they make it easy for another person to detach the base and cabinet later, if for any reason they should need to.

Well, that just about does it. Bad Larry is all grown up and ready to move out. Really the only thing left to do is throw in an old Nintendo Entertainment System and snap a few pics of the fruit of our labor.


