The following instructable gives detail in how to make a simple timber bench for a workshop/makerspace. Two of these benches were made for my university’s maker club (Sydney Uni Maker Club), which was in need of a multi-purpose portable prototyping space.
Our makerspace is shared with many other students, and with the growing size of our membership, we wanted to make sure the space could be adapted as the club scaled-up in size.
These benches are designed around some loose requirements that our planning committee drafted up:
- The bench need to be ergonomic and allow for students to both stand or sit at comfortably.
- The bench should be able to be married together with duplicates of itself, to create various workspace layouts, such as a boardroom, drafting, brainstorming, conference layout.
- The bench must be portable to allow for easy transport within and outside the Makerspace.
- The bench must be able to bear heavy loads, and be secure when not in transit.
- Would be advantageous if the bench could be doubled as a storage space.
As a result, we ended up building a bench with the following features:
- 900mm height bench, suitable for bar stool and standing height
- 1500 x 750mm surface so a pair could be squared-off into a “brainstorming” layout for meetup events with teams of people.
- Wheel castors with locking brakes
- A bottom shelf for storage, which also doubles as a footrest.
- Smoothed edges and a varnished finish to protect from chips, spillages and to ensure longevity.
The total cost of each bench came to $212 AUD including screws and varnish. The breakdown of costs is as follows (All prices in $AUD and have been rounded):
- Pine benchtop – $95
- Timber for frames – $14 (5x 70x35mm x2.4m)
- Timber for legs – $25 (3x 90x45mm x2.4m)
- Plywood – $33 (enough for both benches)
- Brackets – $5 (2x packs of 4)
- Screws – $5 (50 pack of 50mm)
- Screws – $5 (50 pack of 65mm)
- Castor wheels – $30 (4x 75mm wheels)
In this instructable I detail the design of a single bench but many of the photos of the finished product shows a second bench that was successively made.
** I have written the following instructable in the first person but actually designed and constructed the bench with my good friend Andrew (a.k.a. Smarty).**Add TipAsk QuestionCommentDownload
Step 1: Materials and Equipment
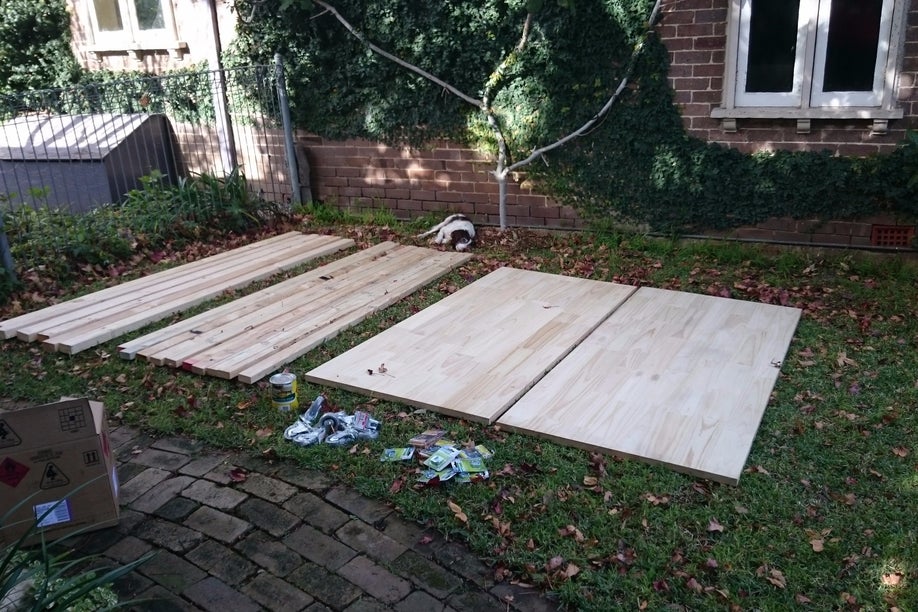
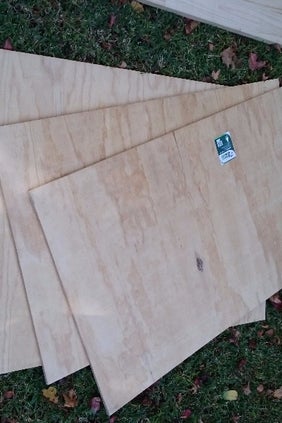
** The photos of the uncut timber show double the required amount as I purchased enough to build two (2) benches.**
Materials selection is an important part of any project and is worth the time and forethought! There are a number of key components which must be chosen and acquired before construction can take place.
Bench Top
For the benchtop I chose a thick solid timber top to give the bench a solid look and feel as well as increase the lifespan of the bench (which is important considering the bench will be living at a university for the rest of its life). A thick benchtop means that the top will not warp and bend where there are no supports underneath and can withstand the damage which is likely due to soldering burns, sawing and hammering.
A cheaper and very viable alternative would be a plywood sheet. Plywood is strong and easily replaceable in case of damage and comes in a variety of thicknesses.
I would not recommend an MDF top as this will not withstand any liquid damage or rigorous use.
Top and Bottom Frames
The two frames required for the bench have been constructed from 70 x 35mm structural pine (a relatively cheap and strong timber) which generally comes in 2400mm lengths. For those in the Imperial system I believe 2x4s would be the equivalent timber (correct me if I’m wrong).
Legs
The legs have been constructed from 90 x 45mm structural pine. The larger size is to account for the weights and forces which the legs will be required to withstand, but also to give the bench a heavy duty look and feel.
The same 70 x 35mm (2x4s) timber could most certainly be used as an alternative. Or, if you want something even heftier, H4 pine posts could be used (These things are invincible and are what I used on my personal workbench).
Wheels
One of the requirements for our bench was that it was portable. The wheels chosen were not the largest there but were easily capable of handling the forces they would experience (The wheels have a rating and this can be multiplied by 4 as there are 4 wheels to take the load). The wheels chosen also had locks installed to fix the bench in place when it was in use (You’re going to have a bad time without lockable wheels in my opinion!).
Fixtures
To fix the frame, legs and top together, a mixture of PVA glue, screws and brackets were used. There were 3 lengths of screw. The longest screws were to build the legs, the middle length screws were to construct the frame and the smallest screws were used to install the wheels at the base.
When choosing screws, I recommend self countersinking screws as they easily go flush with the sides for a superior finish. To choose length, simply ensure that the screws will have sufficient length inside each bit of timber it is attaching.
The brackets and PVA glue were used to connect the top frame to the bench top. The brackets handle the transverse and lifting forces which the benchtop may experience.
Finishing
The bench was finished with a clear oil based varnish (Giving it a glossy finish). Before applying the varnish the entire bench was sanded and all corners/edges were rounded with 70 grit sandpaper followed by 240 grit sandpaper.Add TipAsk QuestionCommentDownload
Step 2: Cut the Timber to Size
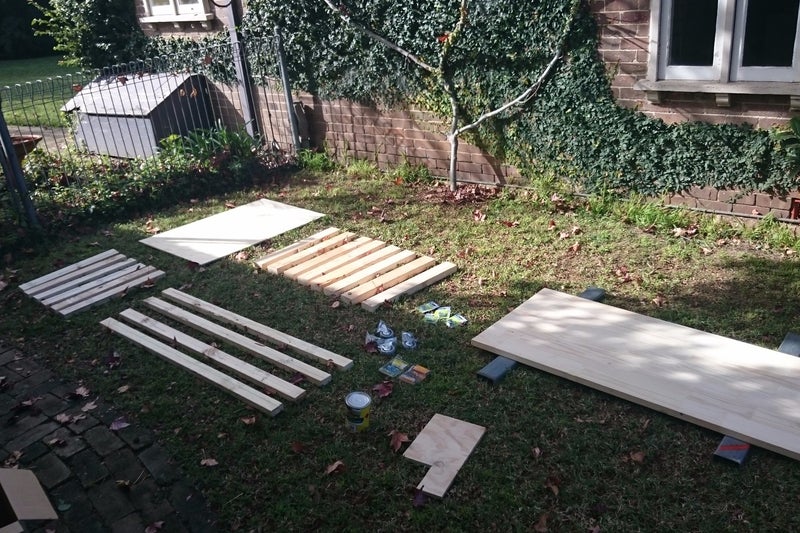
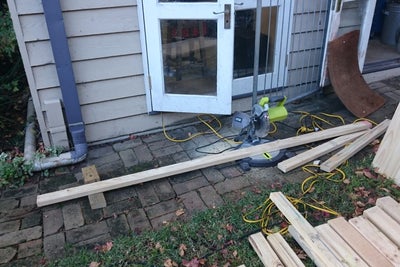
The size of your bench really depends on its application. I chose the following dimensions:
Height: 900mm (including wheels) as this is a universal standard for comfortable working height.
Width: 1500mm (wide enough for two people to comfortably work side by side).
Depth: 750mm so that when two benches are pushed together they for a perfect square.
I like to cut all of my timber before I begin construction as it makes the construction process flow smoothly.
I used a drop saw to cut the long timber to length and I used a circular saw to cut the large benchtop and plywood sheet. I always draw a line where I want to cut and then clamp a piece of timber down to act as a rail for the circular saw as I cut. This ensure a straight and true cut which is imperative for the benchtop as everything is built around it.Add TipAsk QuestionCommentDownload
Step 3: Build the Top and Bottom Frames
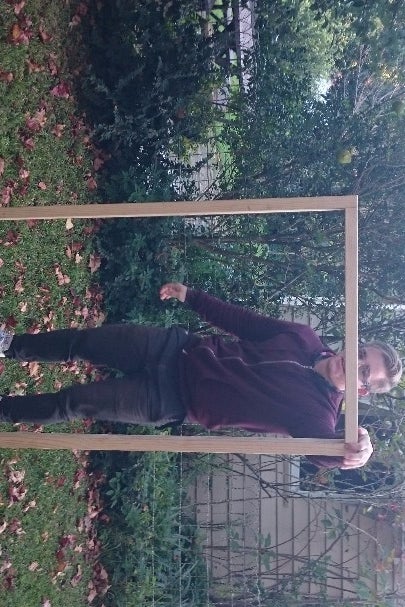
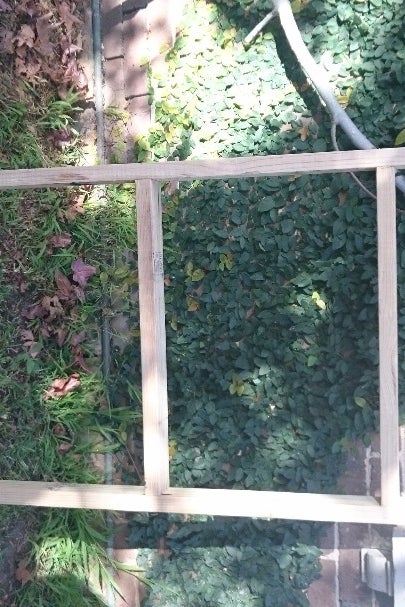
These top and bottom frames support the benchtop and shelf respectively as well as provide the structure to hold the bench’s rectangular shape.
Both frames are constructed from simple butt joints with two countersunk screws, one above the other, at each join (I recommend pre-drilling to avoid wood splitting).
I implemented only a single cross brace in the top frame (not pictured as I added it at a later stage) since the benchtop chosen was so solid and sturdy. If you are using plywood, I recommend two (2) cross braces.
I used two (2) cross braces on the bottom frame to support the plywood shelf.Add TipAsk QuestionCommentDownload
Step 4: Build the Legs
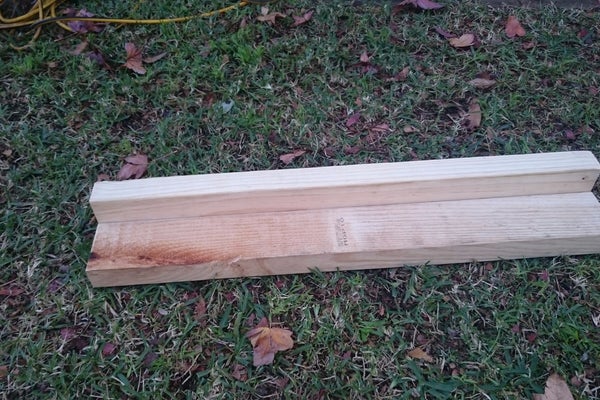

Each leg is formed from two pieces of timber placed in an L shape as pictured. These pieces are joined with three (3) evenly spaced screws.Add TipAsk QuestionCommentDownload
Step 5: Assemble the Bench
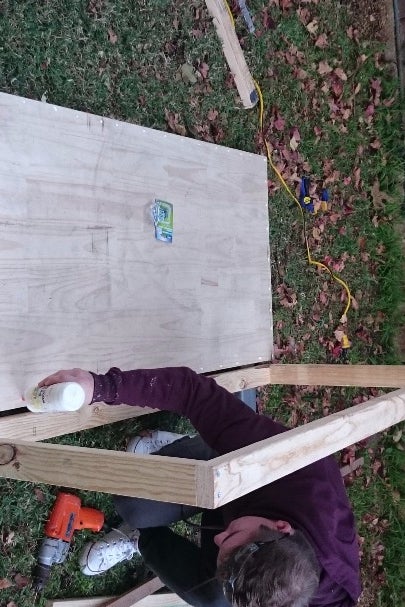
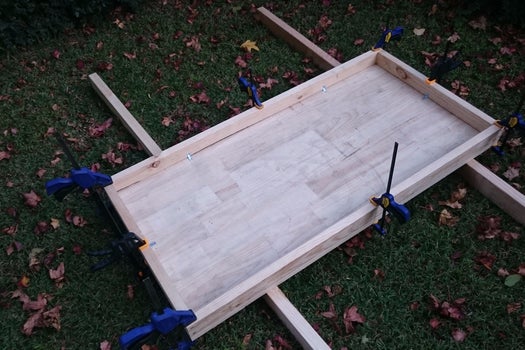
I found that it was easiest to construct the bench upside down, building onto the benchtop and then flipping it over upon completion. This takes the weight off the legs etc while you are trying to assemble the bench, avoiding any unwanted deformation. The steps are as follows:
- Glue the top frame to the benchtop and clamp.
- Add brackets at intervals around the frame to further join the frame to the top.
- Add the cross brace to the top frame.
- Place all four (4) legs into their positions and attach with two (2) screws on each side (4 screws in total).
- Place the bottom frame over the four (4) legs and adjust to your desired height (remembering to take wheel height into account if applicable). Once adjusted, clamp the frame in place.
- Screw the bottom frame into place with two (2) screws on each side once again placed one above the other (4 screws in total).
Add TipAsk QuestionCommentDownload
Step 6: Construct and Install the Shelf
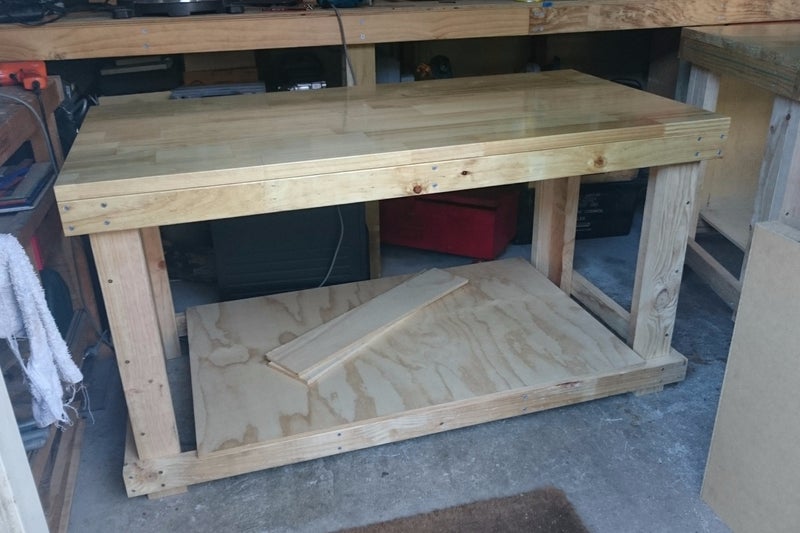
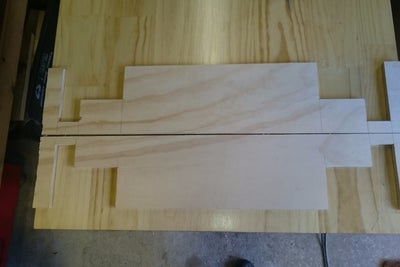
The shelf is constructed from plywood and has been put at a height which allows for users to put their feet on while sitting or standing.
**The trickiest part for this bench design is constructing the shelf to wrap around the legs seamlessly with as little gap as possible. While I think having the shelf the same size as the benchtop looks great, it really was a lot of work to cut the pieces out to fit around the legs and you could just as easily modify the bottom frame such that it sat inside the legs (so that the shelf could also sit inside the legs).**
Due to the sizing of the plywood sheets at my local hardware store and to save money, the shelf is constructed from three separate pieces. One large centre piece (at a width of 120mm which is a standard plywood width) and two end pieces which were fashioned to fit around the legs. I recommend using a single piece if possible as this avoid the ugly change in wood grain and obvious join!
The steps I followed are:
- Install the large centre piece of the shelf using a number of evenly spaced countersunk screws (you may choose to also glue for added strength).
- Fashion the end pieces to fit around your legs. This was done with the use of careful measurement and marking out with a pencil. A jigsaw was then used to cut along the markings and create the two end pieces seen in the photos.
- Glue the end pieces down and clamp. You may also choose to screw them down as I did.
- There are two gaps in the shelf which the end pieces did not cover as you see in the photos. I quickly fashioned blocks from the left over plywood to sit in the gaps and glued these into place.
- I added a thin MDF joiner underneath the shelf at the join as they were not matching up perfectly.
Add TipAsk QuestionCommentDownload
Step 7: Add Wheels (If Desired)
If you would like a portable bench then why not add caster wheels!
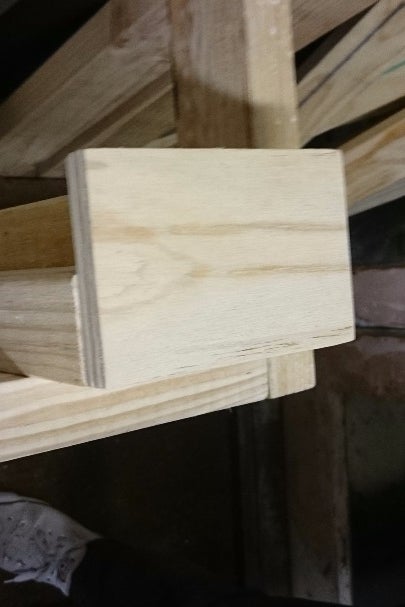
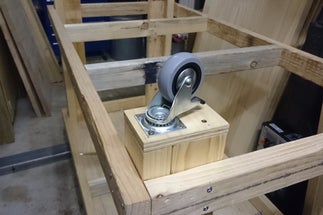
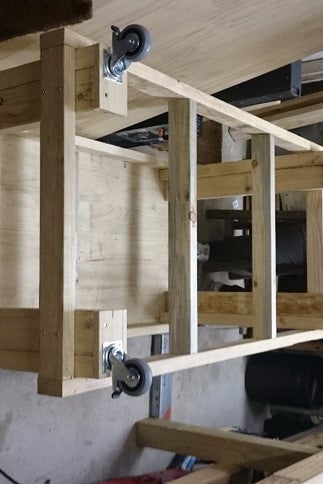
Since it was a bit awkward to install the wheels directly into the bottom of the legs (since the wheel’s base plate would overhang on the inside of the L shaped legs) I added a preliminary base plate constructed from scrap plywood. This base plate was held in place with the same screws which hold the wheel to the plate.
Simple place the plate on the desired leg. Place the wheel in its desired spot and then run the screws through the four (4) screw holes.
Three (3) long screws were used on the outside wheel screw holes that went through the wheel, base plate and into the legs. One (1) shallow screw (which is seen in the materials photo showing the 3 screws) which goes through just the wheel and into the base plate on the inside wheel screw hole was used (as if it went all the way through the base plate it would come out into open air as there is no leg for it to go into at this point).Add TipAsk QuestionCommentDownload
Step 8: Finish Benches
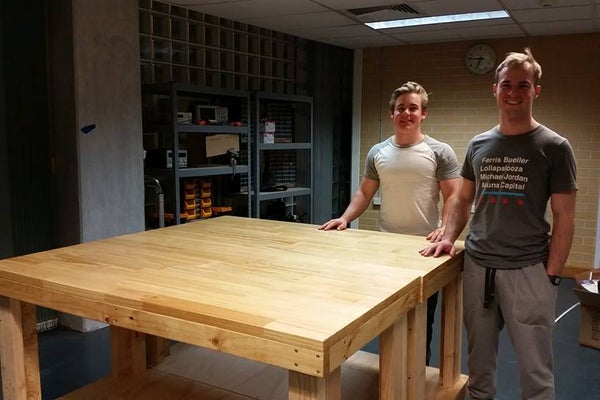
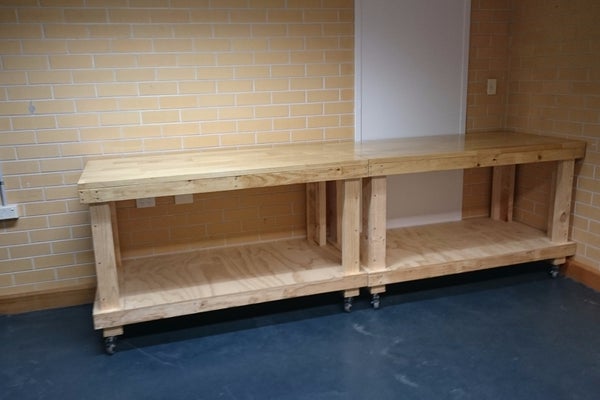
To truly finish your bench I strongly recommend applying a varnish. This not only makes it look substantially better but protects it from any liquid or other damage.
- Round all of the sharp edges and corners using a coarse (e.g. 70 grit) sandpaper.
- Sand the entire bench using a coarse (70 grit) sandpaper, removing any significantly markings and rough surfaces.
- Sand again using a fine (240 grit) sandpaper.
- Wipe down the bench, removing all traces of sawdust. This may require a number of goes with a lightly damp cloth.
- Apply varnish of choice to the bench. I did not have enough varnish for the entire bench and instead opted to just varnish the benchtop and top frame.
- Allow to dry for at least 6 hours (time may vary depending on varnish. Read instructions) and then apply another coat. I recommend doing this step twice for a total of three coats for a superior finish.
Vietnam Plywood
Vietnam Film Faced Plywood
Thank you for you time!


